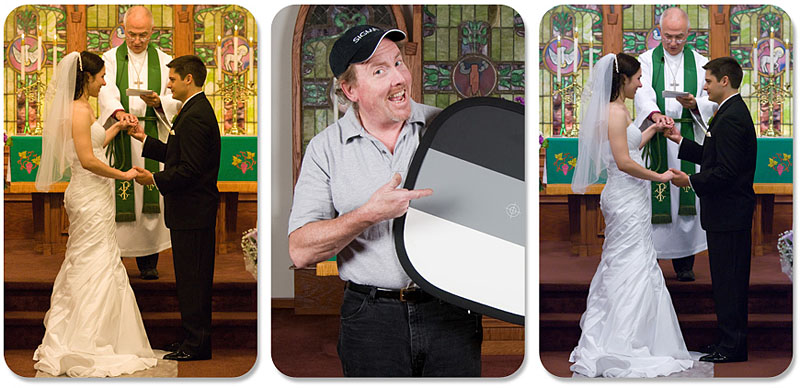
It is an absolute MUST to use a gray-card or similar calibration target while shooting. I have a 24″ PhotoVision Calibration Target with me at all times. I use it for every single shoot I do. In fact, I wrote a blog article last summer for my clients, showing them the difference when using one and letting them know that they should ask their potential wedding photographer how they calibrate.
Here’s the photo sequence I used to illustrate the post:
 The photo on the left shows the shot when using the “Auto” White Balance setting on the camera. The middle photo shows my big dude wedding assistant/second shooter with the calibration target (a la Vanna White) and the third photo shows the shot corrected for custom white balance after using the calibration target. See the difference?
I highly recommend you begin using a calibration target. There are many different ones out there, so look around and find something that looks as if it would be the proper style and size to work best for you.
Here are some link to the various sizes of the one I use. The one I bought (24″) folds down into a circle and comes with a zippered pouch to store it in, but I just stick it down in a pocket of my camera bag without the pouch and it stays collapsed just fine. The PhotoVision target is easy and convenient to use and even comes with an instructional DVD for guidance. I give it 5 Wootness points! 🙂
Love the facial expression on Mr. Wootness.