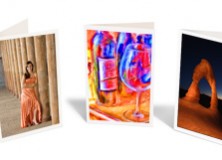
It’s that time of year! You’re either sending your files to the lab to have your cards printed or you’re printing them in-house. If you’re printing them yourself, here’s a set of tips that will make the process easier for you.
These tips are courtesy Red River Paper. I am one of their Red River Pros and have had the great fortune of being able to use almost every single type of paper and greeting card they carry. I highly recommend that you check them out.
Tip 1 – Create a Custom Paper Size in your Printer Properties
In order to use most pre-scored inkjet note cards, you’ll need to define a custom paper size to your printer. Epson, Canon, and HP printers all have this feature. The trick is to always define paper sizes the same way. Set the width to the smaller dimension of your paper and the lenght or height will always be the longer dimension of your sheet. After that you only need to change the orientation button depending on how your greeting card is laid out.

Tip 2 – Use Photoshop or Photoshop Elements for best results
We recommend Photoshop or Photoshop Elements as your best option for greeting card layout and printing. The programs offer the most flexbility in terms of layout size, photo and text placement, as well as color management. Although Photoshop is an expensive program, the Elements version is quite affordable and offers all of the options you need.
Tip 3 – Print the inside of your card first.
If you want to print text or graphics on the inside of your card, print that information first. This means the photo side will only pass through the printer once, which limits the possibility of scratching.
Tip 4 – Decide if you want to print photos on the outside AND inside of your card before you buy your paper.
Not all inkjet printable card stock is designed for photo printing on both sides. Decide ahead of time on your design then make your paper purchase. If you want photos on both sides of the paper look for product that is called double sided, 2-sided, or C2S.
Tip 5 – Make sure your envelopes match the size of your card.

Greeting cards are usually sized to match envelope standard sizes. Here is a chart to help you verify your envelope size is right:
|
Card Size Before Folding
|
Envelope Name
|
Envelope Dimensions
|
|
8.5″ x 5.5″
|
A-2
|
4.3″ x 5.75″
|
|
9″ x 6.25″
|
A-6
|
4.75″ x 6.5″
|
|
7″ x 10″
|
A-7
|
5.25″ x 7.25″
|
|
8.5″ x 11″
|
5.75″ x 8.75″
|
5.75″ x 8.75″
|
|
8″ x 9″
|
#10
|
4.125″ x 9.5″
|
|
Baronial (Square)
|
Baronial Square
|
5.5″ x 5.5″
|
Tip 6 – Feed only a few sheets at a time.
Most inkjet printers are not really designed to take large stacks of card stock and feed them consistently. Be gentle with your machine and only put 5-10 sheets in the paper tray at one time. With extra heavy papers, or fine art cotton media, you may have to feed them one at a time. Some trial and error may be necessary

Tip 7 – Clean your feed rollers!
It is critical to keep the feed mechanism of your printer clean and free of inkjet coating and paper debris, which are key factors in paper misfeed. Go to www.redriverpaper.com/feed for helpful DIY cleaning instructions.

Tip 8 – When printing the outside of your card, make sure the photo side comes out first
Set your layout to that when you click print, the printer prints the photo side of the outside of your card first. This means the outside back of your card will come out of the printer last. This is helpful in preventing head strikes which can lead to black smudges on the edge of thick media.

